Monday 16 February 2015

Gardening Soil Preparation Basics

                       Before getting started on planting, you will need to take some time and prepare your garden soil. Clay, silt, and sand will all need to be mixed perfectly in order to prepare your soil to provide the best possible environment for your plants. The ideal soil conditions that will promote excellent plant growth will be 20% clay, 40% silt, and 40% sand. There are many different tests that are used by gardeners that will provide the information you need to know about perfect soil composition. The first of many tests that can be used is to simply put the dirt in your hand and compress it. The soil will need to hold its shape because if it doesn't, the sand ratio is probably off. While you still have the compressed dirt in your hand try to poke it, and if it doesn't fall apart chances are the soil has too much clay.


If you're still confused about the type of soil you have, there is another technique that you can use that will separate each ingredient. Dump a couple of cups of dirt into a bucket of water. If you take the bucket and shake it around for a while, you'll see that the dirt will separate. Let it settle for a little while and you will actually see it separate into three different layers. From the bottom to the top you will see, sand, silt, and clay. At this point you'll be able to determine which of the three you have too much of.


After you've checked, and double-check, and you have found that your soil is low on a certain ingredient, it's time to do something about it. Sand or silt is probably the easiest to deal with because if there is too much, you can always add a little bit of Peat Moss. Also, Peat Moss and sand are an excellent combination if you have too much clay. Peat Moss works really well because when it gets moist it allows the other ingredients to combine a lot easier. If you've played around with the soil to the point where you can't get the right mix, head over to your house improvement center or your hardware store and find a product that can help you determine the quality of your soil. There should be several different products available that can help you.


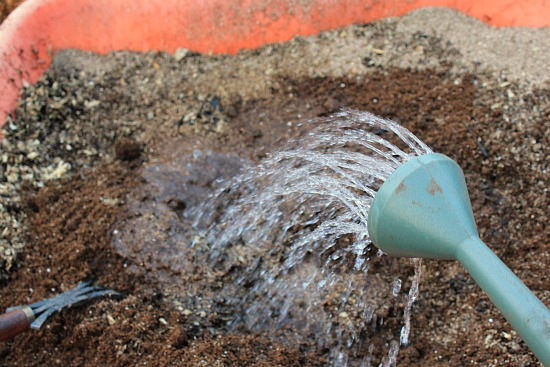
                    When working with your garden soil, you'll also want to make note of the water content because this is also important. Water poses the biggest problem if your garden is located in the lowest area of your yard, where all the water drains too. If you have a garden in this area, the best thing to do is raise the garden at least 5 to 7 inches above grade. This will prevent saturation and provide a maximum amount of drainage.
                      Mixing nutrients with your soil is extremely important at this point, and the reason is many different soils found in urban areas do not contain many of the good nutrients your plans will require. So, at least one to two weeks before planning your garden, you should begin to mix in some fertilizer in your soil. Ensure to mix it in extremely well, and then allowed to sit for a few days. After this is done the soil will be prepped and ready for whatever type of seeds you plan to grow.
The job is not done because even after your seeds have been planted, you will still want to pay attention to what's going on with your soil. You will notice that in the first couple of weeks your seedlings will be using up a lot of the different nutrients around them. This will slowly but surely allow them to sprout into unique plants.


                 You don't want them to run out of food so about a week or two after the initial planting, you'll want to ensure you add at least the same amount of fertilizer as you did before planting your seeds. You want to use your fertilizer sporadically, but you don't want to use it all the time. Rule of thumb for adding fertilizer will typically be every couple of weeks, because this will be plenty to keep your garden green and growing.


                   When preparing your garden soil the procedure can be done quite simply by enssure that the soil is more than adequate, if you have a problem with the drainage take care of it, and make sure you have plenty of fertilizer but you don't want to add it all the time. If you follow the directions in this article you will have a wealth of plants that will provide greenery, beauty, or food to eat, in no time at all. If you're having a problem with any of these steps you can always talk to your local nursery, and let them know exactly what you've done so they can help. You'll find that many of the people that work at the plant nursery are very knowledgeable, and willing to help you prepare your garden soil so you can begin to grow some plants.

Sunday 15 February 2015

10 Easy Ways Energy Tips in Your Home to Save Money

                           Drastic reductions in heating, cooling and electricity costs can be accomplished through very simple changes, most of which homeowners can do themselves. Of course, for homeowners who want to take advantage of the most up-to-date knowledge and systems in house energy efficiency energy auditors can perform in-depth testing to find the best energy solutions for your  house.
Why make your house more energy efficient? Here are a few good reasons:
Federal, state, utility and local jurisdictions' financial incentives, such as tax breaks, are very advantageous for homeowners in most parts of the U.S.
It saves money. It costs less to power a house that has been converted to be more energy-efficient.
It increases the comfort in indoors.
It reduces our impact on climate change. Many scientists now believe that excessive energy consumption contributes significantly to global warming.
It reduces pollution. Conventional power production introduces pollutants that find their way into the air, soil and water supplies.


1. Find better ways to heat and cool your house. 

As much as half of the energy used in homes goes toward heating and cooling. The following are a few ways that energy bills can be reduced through adjustments to the heating and cooling systems:
 Use a ceiling fan. Ceiling fans can be used in place of air conditioners, which require a large amount of energy.
Periodically replace air filters in air conditioners and heaters.
Set thermostats to an appropriate temperature. Specifically, they should be turned down at night and when no one is house. In most homes, about 2% of the heating bill will be saved for each degree that the thermostat is lowered for at least eight hours each day. Turning down the thermostat from 75° F to 70° F, for example, saves about 10% on heating costs.
use a programmable thermostat. A programmable thermostat saves money by allowing heating and cooling appliances to be automatically turned down during times that no one is in house and at night. Programmable thermostats contain no mercury and, in some climate zones, can save up to $150 per year in energy costs.
                 Use a wood stove or a pellet stove. These are more efficient sources of heat than furnaces.
At night, curtains drawn over windows will better insulate the room.

2. Use a tank less water heater.

                                    Demand-type water heaters (tank less or instantaneous) provide hot water only as it is required time only. They don't produce the standby energy losses associated with traditional storage water heaters, which will save on energy costs. Tank less water heaters heat water directly without the use of a storage tank. When a hot water tap is turned on, cold water travels through a pipe into the unit. A gas burner or an electric element heats the water. As a result, demand water heaters deliver a constant supply of hot water. You don't need to wait for a storage tank to fill up with enough hot water.


3. Replace incandescent lights.

The average household dedicates 11% of its energy budget to lighting. Traditional incandescent lights convert approximately only 10% of the energy they consume into light, while the rest becomes heat. The use of new lighting technologies, such as light-emitting diodes (LEDs) and compact fluorescent lamps (CFLs), can reduce the energy use required by lighting by 50% to 75%. Advances in lighting controls for further energy savings by reducing the amount of time that lights are on but not being used. Here are some facts about CFLs and LEDs:
CFLs use 75% less energy and last about 10 times longer than traditional incandescent bulbs.
LEDs last even longer than CFLs and consume less energy.
LEDs have no moving parts and, unlike CFLs, they contain no mercury.

USE CFL LAMPS


4. Seal and insulate your House.

Sealing and insulating your house is one of the most cost-effective ways to make a house more comfortable and energy-efficient, and you can do it yourself. A tightly sealed house can improve comfort and indoor air quality while reducing utility bills. An energy auditor can assess  leakage in the building envelope and recommend fixes that will dramatically increase comfort and energy savings.
The following are some common places where leakage may occur:
electrical receptacles/outlets;
around pipes and wires;
wall- or window-mounted air conditioners;
attic hatches;
fireplace dampers;
inadequate weather stripping around doors;
baseboards;
window frames  and
switch plates.
Because hot air rises, air leaks are most likely to occur in the attic. House owners can perform a variety of repairs and maintenance to their attics that save them money on cooling and heating, such as:
Plug the large holes. Locations in the attic where leakage is most likely to be the greatest are where walls meet the attic floor, behind and under attic knee walls, and in dropped-ceiling areas.
Seal the small holes. You can easily do this by looking for areas where the insulation is darkened. Darkened insulation is a result of dusty interior air being filtered by insulation before leaking through small holes in the building envelope. In cold weather, you may see frosty areas in the insulation caused by warm, moist air condensing and then freezing as it hits the cold attic air. In warmer weather, you’ll find water staining in these same areas. Use expanding foam or caulk to seal the openings around plumbing vent pipes and electrical wires. Cover the areas with insulation after the caulk is dry.
Seal up the attic access panel with weather stripping. You can cut a piece of fiberglass or rigid foam board insulation in the same size as the attic hatch and glue it to the back of the attic access panel. If you have pull-down attic stairs or an attic door, these should be sealed in a similar manner.

5. Use efficient shower heads and toilets.

The following systems can be installed to conserve water usage in houses:
low-flow shower heads. They are available in different flow rates, and some have a pause button which shuts off the water while the bather lathers up;
low-flow toilets. Toilets consume 30% to 40% of the total water used in homes, making them the biggest water users. Replacing an older 3.5-gallon toilet with a modern, low-flow 1.6-gallon toilet can reduce usage an average of 2 gallons-per-flush (GPF), saving 12,000 gallons of water per year. Low-flow toilets usually have "1.6 GPF" marked on the bowl behind the seat or inside the tank;
vacuum-assist toilets. This type of toilet has a vacuum chamber that uses a siphon action to suck air from the trap beneath the bowl, allowing it to quickly fill with water to clear waste. Vacuum-assist toilets are relatively quiet; and
dual-flush toilets. Dual-flush toilets have been used in Europe and Australia for years and are now gaining in popularity in the U.S. Dual-flush toilets let you choose between a 1-gallon (or less) flush for liquid waste, and a 1.6-gallon flush for solid waste. Dual-flush 1.6-GPF toilets reduce water consumption by an additional 30%.


6. Use appliances and electronics responsibly.

Appliances and electrical account for about 20% of household energy bills in a typical U.S. house. The following are tips that will reduce the required energy of electronics and appliances:
Refrigerators and freezers should not be located near the stove, dishwasher or heat vents, or exposed to direct sunlight. Exposure to warm areas will force them to use more energy to remain cool.
Computers should be shut off when not in use. If unattended computers must be left on, their monitors should be shut off. According to some studies, computers account for approximately 3% of all energy consumption in the United States.
Use efficient ENERGY STAR-rated appliances and electronics. These devices, approved by the U.S. Department of Energy and the Environmental Protection Agency’s ENERGY STAR Program, include TVs, home theater systems, DVD players, CD players, receivers, speakers, and more. According to the EPA, if just 10% of homes used energy-efficient appliances, it would reduce carbon emissions by the equivalent of 1.7 million acres of trees.
Chargers, such as those used for laptops and cell phones, consume energy when they are plugged in. When they are not connected to electronics, chargers should be unplugged.
Laptop computers consume considerably less electricity than desktop computers.

7. Install day lighting as an alternative to electrical lighting.

Day lighting is the practice of using natural light to illuminate the home's interior. It can be achieved using the following approaches:
skylights. It’s important that they be double-pane or they may not be cost-effective. Flashing skylights correctly is key to avoiding leaks;
light shelves. Light shelves are passive devices designed to bounce light deep into a building. They may be interior or exterior. Light shelves can introduce light into a space up to 2½ times the distance from the floor to the top of the window, and advanced light shelves may introduce four times that amount;
clerestory windows.  Clerestory windows are short, wide windows set high on the wall. Protected from the summer sun by the roof overhang, they allow winter sun to shine through for natural lighting and warmth; and
light tubes.  Light tubes use a special lens designed to amplify low-level light and reduce light intensity from the midday sun. Sunlight is channeled through a tube coated with a highly reflective material, and then enters the living space through a diffuse designed to distribute light evenly.

8. Insulate windows and doors.
About one-third of the home's total heat loss usually occurs through windows and doors. The following are ways to reduce energy lost through windows and doors:
Seal all window edges and cracks with rope caulk. This is the cheapest and simplest option.
Windows can be weather stripped with a special lining that is inserted between the window and the frame. For doors, apply weather stripping around the whole perimeter to ensure a tight seal when they're closed. Install quality door sweeps on the bottom of the doors, if they aren't already in place.
Fix storm windows at windows with only single panes. A removable glass frame can be installed over an existing window.
If existing windows have rotted or damaged wood, cracked glass, missing putty, poorly fitting sashes, or locks that don't work, they should be repaired or replaced.

9. Cook smart.

An enormous amount of energy is wasted while cooking. The following recommendations and statistics illustrate less wasteful ways of cooking:
Convection ovens are more efficient that conventional ovens. They use fans to force hot air to circulate more evenly, thereby allowing food to be cooked at a lower temperature. Convection ovens use approximately 20% less electricity than conventional ovens.
Microwave ovens consume approximately 80% less energy than conventional ovens.
Pans should be placed on the matching heating element or flame.
Using lids on pots and pans will heat food more quickly than cooking in uncovered pots and pans.
Pressure cookers reduce cooking time dramatically.
When using conventional ovens, food should be placed on the top rack. The top rack is hotter and will cook food faster.

10. Change the way you do laundry.

Do not use the medium setting on your washer. Wait until you have a full load of clothes, as the medium setting saves less than half of the water and energy used for a full load.
Avoid using high-temperature settings when clothes are not very soiled. Water that is 140° F uses far more energy than 103° F for the warm-water setting, but 140° F isn’t that much more effective for getting clothes clean.
Clean the lint trap every time before you use the dryer. Not only is excess lint a fire hazard, but it will prolong the amount of time required for your clothes to dry.
If possible, air-dry your clothes on lines and racks.
Spin-dry or wring clothes out before putting them into a dryer.
Homeowners who take the initiative to make these changes usually discover that the energy savings are more than worth the effort. 

Roof and the Ceiling Maintenance

                   If your house is experiencing leaks from above, it is therefore time to consider home improvement tips for your roof and ceiling. The roof provides the house with shelter therefore it is very essential to protect and maintain it. Constant leaks can cause damage to the house as the moisture from water will eventually affect its structure and material. Homeowners get scared at the thought that their abode will fall apart. So to prevent this from happening, it is necessary to protect the roof and the ceiling as a home improvement technique.


                 When you see signs of leaks in your roof, do something about it immediately. Check out what needs to be done and what repairs should be made. It is better not to procrastinate as this will further damage the structure of the house and costs become higher with delay. People usually use metal roof for their home improvement because they find this more sturdy and simple to set up. Other people choose tiles for their roofing made of clay, concrete or tin as these are also durable.


                         While you are fixing your roof, it is equally important to put roofing insulation as this helps the house ward off the climate temperature. Insulation wards off heat during summer and controls the coldness of winter. This will make you feel more relaxed and at ease in the comfort of your own dwelling. During summer, you are therefore not tempted to use air conditioning. When winter arrives, the warmth caused by the insulation will not make you want to use the heater. This home improvement tip will prevent your electric bills from spiraling up.


               When your roof leaks, this affects your ceiling because moisture sets in there as well. You should also fix this because if you just ignore this, it might fall on you when you are least aware of it thus causing harm to you and your family. You can replace your old one with the new and popular acoustic ceilings which people utilize nowadays because they do not make any sound when they are stepped on from the top. Others go for suspended ceilings placed inches under the real ceiling using a grid made of metal. This gives your house a new and modern look.


               The roof and the ceiling are very important aspects of the house aside from the walls because it helps give shelter and fends off danger. When your old roof and ceiling are to retire, better remove them and substitute them with a modern one. It will make your family safer and will give your house a fresher appearance. Make sure your roof and ceiling conforms to the interior and exterior color of your home. Choose the color that you like most so that after you arrive from work, you will feel good seeing how your house looks.


Home Painting The Right Color for the Right Room

So, you've just bought the house and wish to repaint all the walls in each of its rooms. That would be fantastic. Just make sure you don't choose the wrong color.

So, let's get it started:

1.Your Bedroom.

It's bedtime. You need a room that can make you feel comfortable, warm, and peaceful yet can cheer you up in the morning while you wake up. So, what you need is balancing the colors. One thing for sure, don't use dark colors for the walls. Instead, choose warm ones like buttery yellow, misty peach, or sweet, delicate pink. These colors might be soft and can help you sleep better but they can also be inspiring in the morning. Note this: don't use red or yellow for the walls.


2.Your Living Room

When you go home from work, you'd like to sit down and watch some TV. To relax. Yes, that's what a living room is for. Green is considered the most restful color for the eye. Blue is also good to add calming effects. Both can relieve your stress and get you relaxed.


3.Your Kitchen

The first impression of your kitchen should be 'clean.' Blue or light yellow would be great. Plus, these colors give you the sense of calming and relaxing so when you have to cook, you won't easily get tired.


4.Your Kids' Room

Boys relate to blue while girls to pink. Some people are getting bored with those colors. Why don't you try light green combined with yellow or you can combine purple, light blue and pink. Be imaginative with colors in your kids' room. Their favorite color should be added as well.


5.Your Bathroom

Wish to be different? Forget blue. Aren't you bored to see blue in every bathroom in this country? So, try other colors. Play with bright ones. Try Yellow or Orange. They will surely brighten your day in a cozy morning while you wish you were still in bed.


Before choosing the right colors for your house, it is better for you to learn about the essence of colors. That way, you will know which colors to choose and how it affects your rooms.


Painting Guide


                     There are many ways to decorate and redecorate the rooms in your home. Painting is one of the cheapest and easiest home improvement solutions. At the same time, the walls, ceilings, doors and window frames are the background of the decor and their look and appeal are extremely important. That is why you need to make sure that you will get the work done well.


Start by choosing the paint colors you want for your home. You should consider as many chips as possible, as a start. Learn more about the different shades and their undertones. Put different chips together to come out with the best paint color combinations for the different fittings. More importantly, the shades have to match the furniture and fixtures in the room. Check out the latest trends in paint colors to make sure your interior will be in style.


The next step of your painting home improvement project is to choose the types of paints and additional materials. The modern water-based paints are quite good for walls, but the latex ones seem to have more beneficial qualities. They are easy to apply as well as to clean and to maintain. The oil-based paints are better for trims. Consider using painting materials that are specifically made for ceilings. You have to choose the right paint finish as well. The glossy ones give the room extra brightness, while the flat matte ones cover imperfections and create a more intimate atmosphere.


                Consider getting all the painting tools you will need in advance. Make a choice in line with the surface you will be redecorating. You will find it easier to use foam rollers for larger surfaces and pads and brushes for smaller ones as well as for making applications. You should use brushes with synthetic bristles with water-based and latex paints and natural bristle ones to apply oil-based paint.


                Choose the painting technique that you want to use. Some of the most popular ones include color washing, combing, sponging and lathering. Check out samples to see how the results look and to make up your mind. Study the chosen technique carefully and prepare ready instructions that you can follow easily.


                Before you begin the painting home improvement project, you have to make all the necessary preparations. Move furniture, carpets and rugs away from the surfaces you will paint. Cover the floors with nylon or study cloth covers. Get yourself ready as well. Consider using painter's blue tape to prevent paint seeping.


Prepare the paint and start painting.

Best Home Painting

                     One of the best ways to improve the look of the exterior of your home is through home improvement painting. This is something you choose to do when the outside of your home is starting to look so drab and run down that even your neighbors are complaining. Happily, unless you have some truly serious structural damage, a coat of good paint will have your home looking great and fitting right in with the neighborhood again in no time.


                                            A lot of times home owners are interested in selling their houses and want things to look as eye-cat chingly perfect as possible. This is another time that home improvement painting is used. The color of the paint is not always so important to the owners at this time because they do not plan to be the ones staying in the house to enjoy it. More of a concern in this instance is that the overall end result looks beautiful enough to attract home buyers.

                                              Obviously, if you have a need for this type of exterior painting, you will want to consult with a professional painting contractor. This is the person with the experience it takes to look over your house as well as those around it in your neighborhood so that the best paint colors for home improvement painting are chosen to fit in while also appearing a bit unique. It is also the person who will be able to answer any questions you may have regarding having your house painted.


                                  In just a few years, traditional paint will flake and chip, then its time again to go through the hassle and expense of repainting your home. While putting home improvement task into play, if you are a home or a property owner, then you are forced to repaint homes every couple of years to keep up the new look which creates a lot of confusion when choosing among the options available.

                                                        The exterior of your home is the first view that people notice which should not be left outdated. Interior remodeling and adding accessories is beneficial to increase the value of your home but first, people should feel to walk through your door. Currently, warm earth tones are replacing the plain white or pastels of the 80's and 90's. Repainting your home interior with new fun filled fashion colors can be done by picking a floor dominant color in the room, like a piece of furniture or artwork that you want to keep as a focal point and blend other colors around it. For exterior match the color to the existing brick, stone or trim it accordingly. This will tell potential buyers that your home isn't as old as its built date, but would surely give a fascinating look, increasing their interest to buy.


                                            The color scheme in a room can dramatically turn your mood positive when you have good color combination of roof with flooring as you walk in. Colors are not just about change of ambiance, it would be a good idea to flavor your room colors according to the type of mood you would like to create when in the room. Bright colors like red and orange will energize your room, so better to choose these colors for your social and activity rooms. Yellow is another active color that stirs up your thoughts and brings out the creativity in you. Choose softer colors like blue, purple and green if you are going for a calm and quiet environment like in your bedrooms or bathrooms.

                              Getting people's advice about what suits your home is important but it is you who would ultimately be living in your home, not them, so it's important to go with colors you like while making the home remodeling. Make sure you listen to yourself more than them and follow your instincts to build your dream home.

                               Also, keep it simple, because too many colors will spoil the vibe. Think about sticking with one color and varying the shade of that color, and pick a color or shade that can blend in with almost anything. This is your piece of art, and you can use your furniture and drapery as accents.


                  Before you decide to hire a painting contractor be sure that he or she is the best one for the job. This can be done by arranging a free consultation with one or more painting contractors of your choice. During these consultations, you can ask all of your questions, find out what sort of paint should be used and what color choices are best for your home, as well as how much it will all cost and how long the job will take to complete

Saturday 14 February 2015

Toilet Do's and Don'ts


                           Home owners with septic systems are accustomed to being cautious about what goes down their toilets. These folks know that you don't want things like sanitary napkins, harsh chemicals, or an excessive amount of toilet paper going into a septic tank. Along those same lines, homeowners with composting toilets must also be careful about what goes their toilet, too. In this article, we'll cover some basic do's and don'ts when it comes to what goes in your compost toilet.

                   To premise this discussion, we'll begin with a brief explanation of what a composting toilet is and how it works. These Eco friendly fixtures are a water-saving alternative to a traditional toilet. Rather than being hooked up to a sewer and flushing waste away with water, they are designed with a composting drum where waste is broken down by tiny microbes and oxygen. Special venting systems ensure that compost toilets operate 100% odorless Toilet , and after several months, you are left with ordinary compost, a non-offensive substance that looks and smells just like garden soil.


                                  One of the first and most important considerations with a composting toilet is not to add anything that might affect the microbes' ability to do their job of breaking down the waste. This means no harsh chemicals or cleaning agents such as bleach or ammonia products, as these will kill the beneficial bacteria. A good alternative cleaning solution is a mixture of baking soda and water.

                                           Another potentially harmful substance is antibiotic medicine. Some people like to dispose of old medications by flushing them down their toilets. This is not a good idea with a composting toilet, because any medicines designed to kill bacteria will harm the microbes in your compost. Furthermore, if you or someone in your home has a chronic illness for which they must take antibiotics over an extended period of time (for example, 6 months at a time, or longer), it might be a good idea for that person not to use the composting system, because that antibiotic medicine will be present in their waste.

                                               It's also important to understand that composting toilets vary in size based on the number of people who will be using the fixture on a daily basis. For example, a single adult would not require nearly as large a unit as would a family of six people. The capacity of the toilet, based on the number of people using it, takes into account waste and toilet paper. It does not factor in additional capacity or space for things like feminine sanitary products, paper towels, baby wipes, diapers, or facial tissue. Adding these items not only affects the capacity of your system, but many of these items will also be slow to biodegrade, meaning you may end up with finished compost that still contains part of a sanitary napkin in it-not something you want to deal with. Educate all members of the family that the only items to go in the composting toilet are waste and toilet paper; everything else belongs in the garbage can.

                                              When it comes to composting toilets, a little common sense and thoroughly reading the manufacturer's instructions will go a long way toward protecting your investment and keeping the unit working properly. Just as with a septic system, taking good care of your composting toilet and keeping certain items out that don't belong will ensure that it performs as it should and lasts as long as possible.

Toilet Hygiene

                      To prevent bacteria from waste matter from affecting the health of your family, everyone at home must observe proper toilet hygiene. Children, especially, must be strictly taught to clean themselves and wash their hands properly every single time they use the loo.


Remind everyone at home that their hands will pick up germs from anything they touch in the toilet, including their own bottoms as they wipe them, the flush handle, the tap at the sink, the outside of the hand-detergent bottle, and even the door handle as they leave the loo. You may diligently wipe the handles and levers daily, but all it takes is one household member to touch with unwashed hands any of these items after using the toilet, and it will be immediately recontaminated in time for the next user to pick up the germs.


It may seem a bother, but the best way therefore of keeping toilet germs out of the rest of the home is for people to wash their hands immediately after wiping their bottoms and flushing, then open the toilet door and wash their hands all over again - because the door handle may well have traces of another family member's fecal matter on it.

And reduce bacteria transmission from hands to tap handles, it may help to change the handles to swivel levers that one can easily turn on and off with a quick touch, rather than a stiff knob that one has to wrestle in the grip of one's palm to operate.

Teach everyone to wash their hands well, soaping and rubbing their palms, fingers and backs of the hands, and between the fingers too, for 20-30 seconds before rinsing, because that is about the length of time it takes for soap to kill germs on skin.


Regular hands soap will do for killing germs. over-use of antiseptic washes could actually prove counter-effective in the long term, because these kill off good bacteria and the weakest of bacteria, while leaving the strongest alive to develop immunity to their antiseptic properties, which will make such washes less effective against germs when they are most needed - in hospitals, for example.

Wash the toilet and bathroom regularly, using a separate brush for the inside of the toilet bowl. This separate brush should not be used on any other surface in the bathroom or even any other part of the toilet bowl, and should be washed by flushing it inside the toilet bowl itself. It should obviously never be washed at the sink or in the bathtub.

Home Eco Toilets

The bathroom is one of the most used rooms in the entire house, and a major source of water waste and inefficiency. Showers and toilets are two of the biggest consumers of water.

According to a 2009 report released by the Environmental Protection Agency, the United States flushes over 4.8 million gallons of water per year and the average American flushes 9000 gallons of water per year. The report also stated that replacing flush toilets that use 3.5 gallons per flush with eco toilets that use 1.6 gallons per flush will result in a 34% savings in household water consumption.

There are a variety of different toilets that homeowners can install to reduce water consumption, save money, and save the environment. Many homeowners are choosing to install eco toilets such as the dual flush toilet to reduce water consumption.

The dual flush toilet works by providing the user with a half flush option and a full flush option on the same toilet. Typically a user would choose a half flush for urine and a full flush for feces. The half flush option only uses 0.79 gallons of water per flush, compared to the 1.6 gallons of water required for a full flush.


Many satisfied users report that the half flush is adequate for almost all flushing needs, and that the full flush is rarely needed. Experts suggest that a household can reduce household flush volumes by 68% using a dual flush toilet.

The composting toilet is gaining popularity around the world, and is just beginning to be introduced into American markets. Composting eco toilets work by using naturally-occurring bacteria to break down human waste into a usable compost material called humus.

The toilets do not use any water, are completely self contained, and all waste is collected and composted in the same unit. The toilets are carefully constructed with a special venting and air flow system to prevent unpleasant odors, bugs, and pests.

The composting toilet can even accommodate regular toilet tissue. A composting toilet is more expensive than a regular or dual flush toilet, and will require professional installation to ensure that the venting system is properly installed.

The squat toilet, although common in Eastern countries, is rarely used in the United States. These eco toilets are located flush to the ground, and the user must sit in squatted position to use the toilet.

The waste is removed by pouring water into the bowl with a hose or bucket. A squat toilet requires much less water than a conventional toilet, and many experts believe that it is more sanitary, as the buttocks and thighs do not come into contact with the toilet surface.

Save Money With Some Basic Toilet Maintenance

   Home Inspector   

                                  Conserve money simply by doing maintenance on your toilet. Home Inspectors are expected to flush toilets to see if they work correctly every day. Most of them work correctly and other ones do not work so well. By far the most common problem I personally come across is toilets that need tightening because they are loose at the floor. This tends to cause problems in several different ways; leaks will contribute to major damage of the floor and can evolve into a mold problem, not to mention staining the floor covering. A leaking toilet can create a water supply for termites along with other wood destroying organisms, and if left unchecked a leaking toilet can cause considerable structural damage to the home Every so often you should check your toilet to determine if it is loose, you can actually just wiggle it back and forth to see if you have movement. In the event you actually feel it move tighten the closet bolts located on the sides of the toilet at floor level. Please do not over tighten these bolts; you could break the porcelain toilet. If tightening doesn't solve your water leak you may have to take the toilet loose from the floor and replace the wax seal on the base of the toilet; Unless you are actually a do it yourself individual this is probably a job for the plumber. You should be constantly looking for issues in houses, if you look also see so much thrown away and wasted money simply because of poor toilet maintenance. Did you realize that a toilet flapper valve, quite often known as a flush valve ball that is not effectively seating could very well leak over six gallons of water a day that is virtually two thousand gallons a year!

To actually check the flapper valve look inside of the toilet bowl and look to see if you can notice a little steady stream of water flowing, it is actually due to the flush valve is leaking and needs to be replaced. Another great technique to check for a seeping flapper valve would be to drop just a little food coloring in the tank water and then check out and see if the shaded water is leaking directly into bowl. If you need to replace the flapper valve you'll be able to take a look inside the tank and look to see what variety you have. Buy a replacement at your local hardware store; Just take out the existing one unhook the main flush chain, rod or plastic-type strap (No matter which design you have got) and snap the new one directly onto place. A different situation to look for is going to be the water level inside the flush tank. If the actual water level isn't actually at or near the marking inside the water tank; adjust the float to get the water level the place where it really needs to be. If the water is flowing directly into the overflow pipe this really is costing a considerable amount of your hard earned money; by going straight down the drain. In conclusion general maintenance of your toilets can save you almost 2,000 gallons per toilet.

Toilet Odors - How To Eliminate

Home Made Toilet Cleaner.

Natural cleaners for toilets:
There are several natural ingredients you can use to formulate your own toilet bowl cleaners. Making your own allows you the freedom to use whichever ingredients you feel are safest for your family, are readily available, and will perform the best.

White vinegar: You’re probably bored of hearing all the hype on green-living websites about  for natural cleaning. But I can’t stop singing its praises. Vinegar is a mild acid. It disinfects, eliminates odors, and is extremely safe.
Borax: Contrary to inaccurate information on some websites, borax is NOT the same thing as boric acid (which is toxic). It is actually sodium tetra borate, or baking soda, in very LARGE amounts. Borax is a great multi-purpose cleaner that whitens, deodorizes, and removes stains.
Lemon juice or citric acid: Citric acid, also found in lemon juice, binds to minerals in the toilet bowl making them easier to eliminate. It may help diminish tough toilet stains left by hard water

There are the things you do with a toilet, the germs you associate with it, the images you have from public restrooms, the fact that you have to clean it-all of these details leave the toilet somewhat... tainted.

What's the worst taint of all for the toilet? It's the taint of smell; after years upon years of use to rid you of your own refuse, something is bound to give. Perhaps it's the toilet bowl itself? Or is it the tiles, the walls, the sink, the drain or the bathtub? Pray that it isn't the septic tank though, because that will really stink.

So your toilet and bathroom doesn't exactly smell of flowers, or it does smell of flowers... the carrion flower variety, that is. What should you do?

Try to identify the toilet smell, of course. Does it smell damp? Musty? Does the odor smell like urine? Feces? Or sewage? Or does it smell like something died somewhere in your bathroom? You'll need to try to locate the smell too. Do you smell it everywhere in the room or only in certain places like near the toilet or near the sink? Do you have a smelly clothes hamper in your bathroom that's stinking the whole room up? Identify the origin of the smell, and then go from there.


Basic Toilet Odor Removal

* If you smell an unpleasant odor in your bathroom, and you need to cover it up fast, simply light a wooden match in the middle of that room. Lighting a match produces sulfur dioxide. This chemical is so strong that it hides most other odors from your noses for a short time.

* Obviously the easiest way to make your bathroom smell better is to just open the windows and let the fresh air in! Unless the temperature is below zero, that is, or it's raining. If you can't let fresh air in, there are many other methods available.

* You will probably need something stronger than soapy water to get rid of toilet smells. Specifically, white vinegar or hydrogen peroxide counteracts the natural oil in bathroom scum. Just get 1 liter (or quart) white vinegar or 3% hydrogen peroxide (peroxide may cause bleaching), ¼ c. baking soda, 1 tsp. dish detergent (also removes grease) and mix them together. This solution of vinegar/peroxide will dissolve and remove the odor-causing crud instead of just spreading them around.

* Lighting a candle... even an unscented one... in your bathroom can eliminate odors. Or, if you don't want to create a possible fire hazard because you have kids or pets, set a candle that has a strong fragrance in your bathroom. It will just cover up odors instead of getting rid of them, but at least that room in your house will smell better for awhile.

* Ammonia is also a very useful cleaning agent in killing that salty toilet smell. Clean your toilet with ammonia once, especially on the outside. Do not let ammonia get near the bleach, though.

* Baking soda is a good odor absorbent. Put a generous amount of baking soda in an uncovered container (the size of the container depends on the size of the bathroom) and leave it for several days. Remove the baking soda and replace it with a new batch and leave it for a couple of days. Continue replacing the baking soda until it has cleared the toilet smell.

* Hydro chloric Acid is also advisable. Only for very stubborn stenches, this caustic chemical is very powerful and can tackle smelly stains as old as forty years. But be very careful in its usage and do not leave for it for any longer than the directions say, as it can eat away at the porcelain itself, thereby causing surface roughness that will make the toilet stain even quicker and smell even worse in future.

* Get a sack of charcoal to absorb the bad smell; charcoal is used not only to filter water and other things, but is also utilized to soak up odors, just like baking soda. If you see charcoal in an odor-removing product, it's likely to succeed at removing odors.

* Disinfect the walls, ceiling, flooring and all fixtures; a lot of people forget to clean them, but these areas have probably collected quite a bit of toilet stink from all those years of use. Do yourself a favor and put the shower curtains and the carpet in the washer, scrub the tiles, and wipe down porcelain tub and sink with a good dose of ammonia, just to make sure that the toilet smell is gone.

Maybe the toilet smell is in the floor tiles grout. If that's the case, then a strong chlorine bleach soak will work. Also some bleach in the bowl overnight may help. Turn the fan on to remove the bleach smell.

* Clean your toilet. Speaking of the toilet bowl, perhaps a more detailed method in cleaning it is in order. Use liberal amounts of cleaning agent or disinfectant and a bowl brush to really scrub at the porcelain. Afterwards, let the solution sit for a minute before the inevitable flush. Whatever chemicals you use, remember to respect the directions given and follow them exactly; in particular; never mix chemicals as this can be extremely hazardous. Make sure there is sufficient ventilation while you are working and ideally, wear eye and skin protection.


Advanced Toilet Odor Removal

Assuming that your bathroom is clean, i.e., the toilet is scrubbed and has been disinfected, there is no mold or mildew present, the shower curtain/door is free from soap scum, the shower/bathtub have been scrubbed, the tile floor has been swept and mopped, or the carpet is dry and free from spills, and you still smell something unpleasant in the air, then it's time to investigate the problem.

* Septic Ulcer. Do you have a septic tank? The odor is a warning that there is a problem with the septic system. Sometimes, the sewer might be clogged and needs to be checked, which is the reason why the smell still remains. This bathroom odor can spell big trouble if it's not remedied as soon as possible.

If your house is connected to a city sewer system, you'll need to contact a plumber or the city to check out and identify the exact cause. If you live in a rural setting and your sewage is handled by a septic tank, then you'll just need to call a plumber. Sewage odors in your bathroom drains can mean there's a problem in the system. That is, the sewage may be backing up and not running out as it should.

Another thing to check is the exhaust pipe which may be clogged too. This is one big problem to solve. If you're renting, let your landlord know before the septic starts to back up. Now there's a smell!

* Wax on, wax off. This is another common problem that can make your bathroom smell as though it's never been flushed even after flushing. If the wax ring that seals the base of the toilet to the sewer pipe has gone deficient, it can allow gases and odors to come into the room from the pipe.

It could also be that the toilet is not seated well when installed; as such, it may require a new wax gasket underneath. Call a plumber and see if they can find the problem. Or do it yourself by replacing the ring then resetting your toilet; the problem should stop by then.

* Check the Gasket. There is a gasket in the connection with the bowl and the pipe leading to the outside. In Wales, for example, there is also the gasket which sits between the floor and the bowl. Either could be damaged.

Check the level of water which is entering the water tank; maybe the water flush is set to light and the lack of water is emptying the trap at the S bend. Try filling the bowl half full with clean water and put some food dye in the water tank, then flush.

Check the level of the dye in the bowl; you should see the color plainly. If not, your toilet is emptying too much. If that's the case, then get someone who can service your type of toilet. There should be water left in the bowl after a flush to act as a seal against sewer gas even with the low-flush type.

Toilet Odor Removing Products


* Lime-A-Way Toilet Bowl Cleaner has been specifically formulated with extremely strong lime fighting ingredients to remove those stubborn, unattractive calcium deposits that form in your bowl. These ingredients are biodegradable and organic, are safe for the environment and on your septic system. Lime-A-Way also contains highly potent hydrochloric acid, which is its main cleaning ingredient and is extremely tough on odor-causing germs, grimes and toilet residue.

Kitchen Sinks Types

The sink is the most important spot in any kitchen and it also one of the most frequently visited spot in the home. It is considered that at any given day, the morning work starts at a kitchen sink and the night work finishes at the kitchen sink. So, it is absolutely essential for the homeowner to select on the best type of kitchen sinks that will perfectly compliment the look as well as the entire set up of the kitchen area. It is also imperative that the homeowner should select the right sink that will be easy to maintain apart from being highly durable. Nowadays, markets all over the world are flooded with a wide array of shapes, sizes and designs of kitchen sinks that are made from various types of materials. There are so much of models available in the market, that the homeowner will not be finding it difficult to choose the right kitchen sink that suits the need and the decor of his or her kitchen.


The different mounting types are surface mount, wherein the sinks rim is visible on the top of the counter and the under- counter mount, where the sink mounts under the counter and the rim is not visible. The newest and trendy look that the sinks have these days, go well with the latest and contemporary designs of the modern kitchen. The looks of the kitchen sinks range form the normal domestic look to the more commercial or professional look to the contemporary old world styling look. Once the desired look is arrive at, it becomes relatively easy for the homeowner to choose the sinks made of materials like stainless steel, porcelain, marble, granite, copper or brass.


Stainless steel kitchen sinks are the most popular and common type of sinks seen all over the world. They bring out the professional look to the entire kitchen and will be a perfect compliment to any modern designed modular kitchens. The reason for their popularity is that they are highly durable and are very easy to maintain and will last a lifetime if little care is meted out to them. Another kitchen sinks that are slowly gaining popularity all over the world is the granite kitchen sink. They are also the most durable type of sinks whose surfaces are resistant to scratching, chipping and staining apart from being heat resistant. The granite kitchens are slightly on the expensive side, but are highly durable and also resist the rigors of everyday life and needs least attention or care.


If one desires to add a touch of class and antiqueness to the kitchen, then going for the copper or the brass kitchen sinks will be the best option. Copper sinks provide the most contemporary and elegant look not only to the kitchen but also the entire home. They are made from heavy, solid weathered copper or dark brown copper sheets with visible hand hammered prints by artisans on them. The extra thick casting provided on the copper sinks will easily help it last for a lifetime and also help them in absorbing noise. They are highly resistant to stains and discoloration and become more elegant as it ages. Copper kitchen sinks are usually under mounted and are very expensive and fall in the luxury category of kitchen sinks. Kitchen sinks, generally are available as a single or double sink and also come in round, rectangular, square and oval shapes.

Kitchen Granite Top

A lot of women, and not a few guys, are rather specific about their kitchen area. They like every thing to be just so and detest anything to look messy. If they have Formica counters it drives them crazy as the Formica frequently cracks and chips and it can be tough to replace as the patterns alter on a regular basis. This is the reason most top chefs and people who adore their kitchens enjoy having a granite top instead of a Formica covered top.

It might not be the cheapest thing in the world to have granite tops installed in your kitchen though. The granite needs to be mined as well as processed and polished as well as cut as well as shaped prior to it being installed in your house. It is a rather lengthy as well as labor intensive procedure which means that the actual completed product is not going to be cheap either. The end result is definitely worth it though.


It's also entirely possible that you will need to either reinforce your cupboards or replace them to support the stone. Granite tops are usually a lot heavier than pressed wood covered in Formica. It really will look a good deal prettier and will last a great deal longer too.

You can be sure that once you have changed to a granite top you won't look back and will want to make sure that each and every kitchen you have from then on has the exact same type of counter top. Granite doesn't chip or crack or peel when it's used just a little roughly. You may also make use of the counters as cutting boards, something that you would not get away with on a Formica top counter. It's also very easy to clean. All you need is hot water and a cloth and even the most sticky mess can be wiped away. Formica has a tendency to form cracks as well as crevices where food debris and dirt get caught and make even the most clean counter-top appear dirty since you are not able to get rid of the dirt.


This hard wearing property of the granite top also makes it a much more hygienic surface for kitchens than Formica will ever be. You don't have the actual cracks and crevices where food could possibly get caught as well as breed germs when your kitchen counters are done in granite. Which means that your kitchen can be a great deal cleaner as well as safer for your loved ones.

It's no surprise that the best chefs and people who love their kitchen area would rather have a granite top as opposed to a wood or even Formica top. Granite simply lasts so much better as well as keeps things so much more healthy in your kitchen. If you are planning to be redoing your kitchen it may be a good idea to hold off as well as save a little longer to be able to afford to have granite put in instead of just replacing the old Formica with new Formica that will wear out just as rapidly. Think about it, you will like the result, I promise.

Modular Kitchen Advantages

Cooking has become a joyful experience with the advent of modular kitchens. These kitchens have transformed the complete decor of a home with its amazing designs and styles. Now a days these become so popular that most of the people prefer to install them in their homes regardless of their prices. The dual advantages of both style and convenience have escalated their demands.


Reasons Why These Kitchens are So Popular

The modular kitchens are far better in comparison to the ordinary ones. These kitchens appear modern and chic and can be fitted even when there is space constraint. There are many advantages of using these fitted kitchens and some of them are:

Trendy and chic: these appear quite chic and stylish with a variety of contemporary designs and colors. A huge variety of colors can be obtained including blue, green, red, orange, birch and hues of gold and cedar.
Maximum utilization of space: the modular kitchens are ideal for even small spaces as with a proper design and plan, you can obtain maximum storage facilities.
Easy to clean: these kitchens are quite easy to clean and maintain.
Variety of designs and colors: You can choose from a variety of designs and attractive colors. Kitchens with simple designs are also in vogue these days.
Quick installation: it takes very little time to install them kitchens as most of the fittings are ready made. The experts needs little time to install them and it's quite handy for homeowners as well if the gets a short session of installation guide training.
Maintenance: it is also easy to repair individual components of the kitchen separately.
Durable: the kitchen accessories and components last for a longer period of time if all the materials installed are authentic and of superior quality.
Accessories in Modular Kitchens


A well equipped kitchen requires a number of accessories but the modular kitchens are inclusive of some of the best accessories which make cooking a fun activity. Some of the essential accessories include:

Cooking range or hob: electric stoves and gas stoves have been transformed into a new compact unit which can be engraved into the granite counter tops. Such hobs are clutter free and leave ample space for cooking. It is a single unit which has multiple burners for quicker cooking.

Units or pull out drawers: the units are the best features of modular kitchens as it helps in storing many items like utensils, food items and so forth. There are different storing capacities for different units. You can choose them according to your requirements.

Cooker hoods: cooker hoods are essential in eliminating smoke from the kitchen. Electric cooker hoods are efficient and used in many modular kitchens.

Adjustable shelves: these shelves have handles for sliding drawers which can be used for storage facilities.

Shutters: Shutters are widely used in modular kitchens as it is best way to store crockery like plate and bowls safe and clean.

A variety of modular kitchen designs are available online where you can select the best among them according to the space available in the kitchen and the estimated budget. These fitted kitchens prove to be a style statement with its contemporary designs and functions.